Wrote the wiki version first, this is the converted Adothria.com version XD
Overview
Start Point: | Speak to Inspector Fairhogg in the Guard's Archive. |
Requirements: | |
Lone Wolf requirements: | Level 63 |
Items: | |
Recommended: | |
Enemies: | George 'Knuckles' Allsop - Level 140 (synced to your lowest Crenopolis monster +84) |
An Imposter Among Us
Meet Inspector Fairhogg in the Guard's Archive and ask if there are any interesting cases. He notes that something interesting has indeed popped up concerning the Merchants' Guild, and directs you to Baldwin Vranch for more details.
Senior official Baldwin Vranch and renowned merchant Rom Harrington are sitting in the northwestern corner of the Guild. Tell Baldwin you're here to investigate a case. He notes that this is a sensitive matter - but since you've completed the Guild's challenge, you're familiar enough with the guild to take the job.
He proceeds to reveal that the Guild have been receiving complaints about forged documents, which are being used to trick shopkeepers and merchants into handing over their goods - destroying their reputation while also costing the Guild a priceless painting.
Ask what you need to do - and Baldwin simply states that you need to catch the one responsible. However, it won't be that easy as the forger is likely to be scared into hiding. Suggest that you could go undercover, to his approval. Request clues from him to receive some Suspected Forged Documents. If you need assistance, Fairhogg can tell you how to tell forgeries apart. Baldwin suggests looking for some common theme that reveal more details of the forger.
If you tell him they'll never be caught, Baldwin will be disappointed, asking you to tell Fairhogg to send a capable detective in your stead.
Take the documents back to Fairhogg - if you try to sort them yourself via the quest inventory, you'll remark you need a workspace which he may provide - and update him on your case progress. Fairhogg is appalled, especially since the magical storm is keeping trade ships from sailing.
Ask him where to sort the forgeries to be directed to the Casework Board on the wall in the Detectives' Office. He recommends you look at the state of the wax seal, any common missing features such as a signature or border decoration, as well as the ink quality.
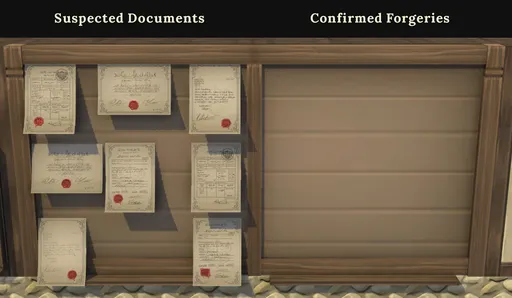
There are eight total documents to inspect - click on them to open a menu to either inspect (zoom in) or mark as forgery to move them to the right. You may mark any forgeries as authentic to move them back to the left.
Board solution:
- The middle-left file has an incorrect border.
- The middle-right file has a missing seal.
- The bottom-left file has faded ink.
- The seal on the bottom-right file is wrong.
Once all forgeries have been identified, you will take them into your quest inventory. You still need a more scientific approach to examine them more closely, so use the documents on the forensics machine in the forensics lab with a ![]() Moderate Potion Forensics. If you don't have one, you'll have to either make one, buy some from Ebsworth, or traded from other players.
Moderate Potion Forensics. If you don't have one, you'll have to either make one, buy some from Ebsworth, or traded from other players.
Once the analysis is completed, you will receive a Forensic Report. Note the wax, paper, and ink sections.
If you report your findings to Fairhogg, he notes that there aren't many places where red candles are available in bulk - which narrows down several possibilities but does not provide any more useful information - and neither will Baldwin.
Go straight to Candice in Bobbin Road South and ask about her red candles - they're very popular at the moment and seem to be a best-seller. Ask if there are any customers buying a lot of them - but she can't recall, which unfortunately means they're being stolen. Given that you are in Crenopolis, however, this isn't an uncommon sight. Offer to sketch the culprit and she will allow you to stakeout her stall. She asks why you don't just arrest them on the spot - if you say it's to stop them going into hiding, she'll understand and will want the ringleaders captured - but she'll also take your word for it if you tell her it's confidential information.
Don't offer to stakeout her stall upfront, as she'll assume you just want to watch her be robbed!
Use the Stakeout Spot to keep an eye on Candice to initiate a cutscene where you witness a young man with brown hair steal her red candles before running off.
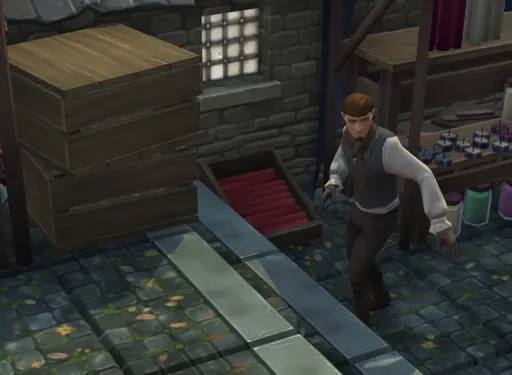
Open your toolbelt and use your quill and ink with your paper to sketch the thief's face. If you do not have these items, they may be obtained in Captain Degreene's Office (don't worry, she won't mind, or even notice). As you sketch, you mention his dopey-looking eyes, oversized ears, and weird little chin beard.
Take your sketch to a City Guard in the Investigation Hall to identify them as Jerry the Jug, a repeat offender caught for some previous petty crimes. The last time he was arrested, he came into the guardhouse with a vase on his head - hence his nickname. Fortunately, that incident resolved without serious consequences.
Cat and Mouse
You may ask Cid where Jerry is - he'll point you just down the road. He will also give you the humorous story of how Jerry's head became trapped in a vase, if you ask him.
Head over to Lord's Road Central to confront Jerry. He protests that he "ain't doing nothing" - and you can point out his use of the double negative here to mean that he actually is doing something - but tell him that you need to ask some questions.
If you talk to him about the vase stall, he reveals that he wants the vase for his mother - who is envious of their neighbour Mrs Bucket's new vase. He insists that he's on the straight and narrow, an example of the city's functional justice system. This sounds... somewhat shady.
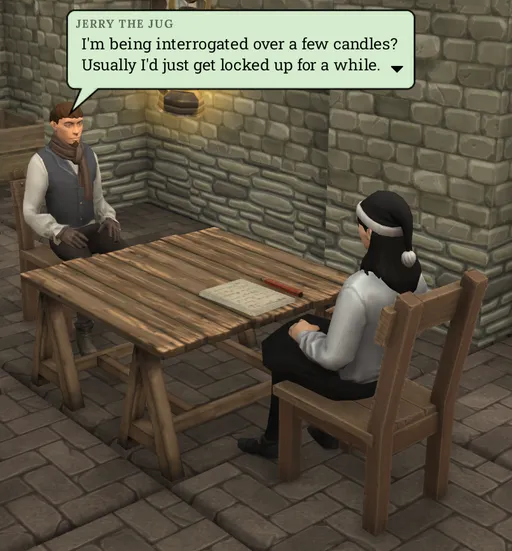
Jerry doesn't want to be caught talking to the guards, so you suggest somewhere more private. He will try to protest, but say that the Merchants' Guild are after him with evidence, suggesting he get off the streets before he's caught by their bodyguards. Jerry agrees to drop by the guardhouse, where the Desk Sergeant will show him into the Interrogation Room. Jerry is a little apprehensive, but tell him it's the safest way to get the Guild off his back.
Head into the Interrogation Room and talk to Jerry there. He warns you that he's not saying anything that will incriminate himself, instead catching up with his shady civilian friend behind the bars. Sit him down in the interrogation chair to grill him.
Interrogating Jerry:
You will confront him about the stolen candles:
- Start with any dialogue option you like from the initial three - this will unlock the fourth option.
- Confront him directly by saying there's more to this than just you wanting candles, and you will eventually reveal your forensic report about the forged documents.
- Tell him you know where he's been - the Merchants' Guild - and he will eventually slip up by mentioning that the paper they use is locked away with the seal wax.
- Tell him you know what he's done, and confront him about black dye, noting that his hand looks smudged. He tries to play it off by saying he had to dye some clothes, but at this point it's evident he's lying as all three pieces of evidence are now connected - that'll be enough to lock him away.
With all the evidence in place, you accuse him of acting alone and being the forger, but he bursts into tears saying he has no idea how to forge documents. Ask why he's protecting the actual forgers, and he will confess that he wasn't sure how serious the situation was, finally opening up.
Jerry reveals that his employers use a middleman to pass him instructions, and he's not actually sure who his bosses are, nor that they were forgers. He reveals that someone named Charlie in the back alleys is the one sending him on his errands. The exact meeting spot changes to avoid guard detection, but the next meeting is at Twiddle Corner - but Charlie will only talk to known thieves. He reveals that the thief the forgers had recruited, Robert Redeye, had to leave town in a hurry for... reasons - there should be a file on him in the Guards' Archive - and this is your ticket into the gang. With all the relevant information, you release Jerry on account of his cooperation - for today, completing the interrogation.
A Redeye for Detail
Take your findings about Charlie back to Fairhogg, who suggests that you use Charlie to your full advantage. He also reveals that the reason Redeye fled the city was due to a failed heist. Tell him your plan to pose as Robert Redeye - you'll need a good disguise. As Bladrick was the person who reported Redeye, his file in the archives might have clues to his appearance.
If you tell him that you plan on doing jobs for the gang to earn their trust, he approves too - provided you're recruited. You'd most likely be continuing Jerry's work, but as the Guardhouse have funding for such operations, the businesses will be reimbursed. Fairhogg doesn't think it's a good idea to let the shopkeepers know beforehand though, saying that it needs to look authentic to avoid spooking the forgery gang - "Think of it this way, the shopkeepers are undercover too, they just don't know it yet."
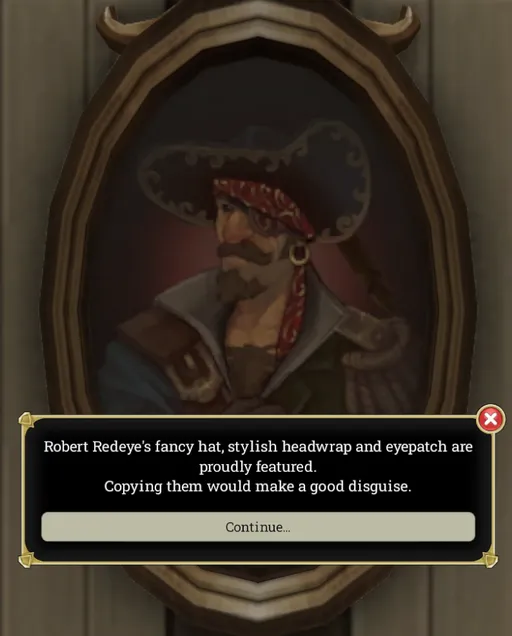
Pull out Bladrick's crime report by searching the A-Cla files and read it from your quest inventory. The report mentions a portrait in Bert's Gallery, so make your way there and study the Portrait of Robert Redeye at the back of the gallery. You make a note of his fancy hat, stylish headwrap and eyepatch, noting that you'll need a skilled leatherworker in order to replicate them.
You may optionally talk to Bladrick himself for some additional details about Redeye's heist.
Head to the Leatherworks and speak to Jack Wellis about making a disguise, describing Redeye's headgear in detail. He notes that it sounds complicated, but you're accomplished enough to be taught how - you'll need some ![]() Basic Halebeast Leather for the stitching, and Quinnis at the Textiles Stall in the Waterfront Market can provide you with stylish material.
Basic Halebeast Leather for the stitching, and Quinnis at the Textiles Stall in the Waterfront Market can provide you with stylish material.
Head to the Waterfront and buy the hide from Franz for 476![]() (if necessary) before sidestepping into the Market to talk to Quinnis about the headwrap and eyepatch. He's willing to part with some material for 91
(if necessary) before sidestepping into the Market to talk to Quinnis about the headwrap and eyepatch. He's willing to part with some material for 91![]() 200
200![]() - and unfortunately you can't haggle any lower. Once you have the material, process the hide into leather at the Tannery if necessary.
- and unfortunately you can't haggle any lower. Once you have the material, process the hide into leather at the Tannery if necessary.
Once you have both items, go back to Jack and you will make an undyed disguise under his supervision. Jack then sends you off to City Dyes with a compliment on your fine needlework. At City Dyes, use the undyed disguise with the black dye tub to finish it - noting that unlike Jerry, you managed to do it without staining your hands.
NB: You will not be able to equip the disguise if your head gear slot is occupied or transmogrified - you'll have to remove your helmet and disable transmog.
Dishonor among Forgers
With the perfected disguise, head to Twiddle Corner and meet up with Charlie. Charlie is excited to see you, expressing his gratitutde that you're back in town while lamenting Jerry's dullness, clumsiness and unreliability. He clarifies that the bosses need certain items to continue their work - specifically red candles, official Merchants' Guild paper, and magnifying spectacles.
Charlie will give you no other clues, so you'll have to get the items yourself:
- Head back to Candice and "help yourself" to some red candles (don't buy them, as you'll mention that your cover will be blown if you do that).
- Next, head to the Merchants' Guild and search the eastern bookcase for the paper.
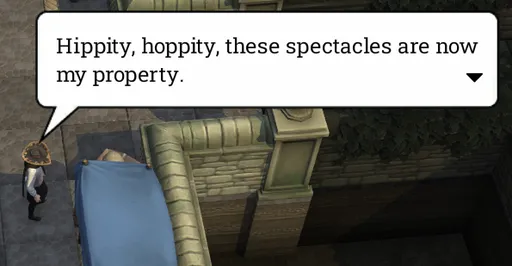
- Run north to the Monocle Market and take (not buy!) the spectacles from the mannequin.
Hand all three items over to Charlie to be offered a promotion - a courier for The Administrators gang. Charlie explains that from now, he will provide you with forged delivery documents, and once the items on the documents are at hand, to bring them to their office on Judge Street - these are Charlie's bosses who helped him out of prison. They prefer committing crimes from the shadows while using Crenopolis's daylight robbery problems as a cover while posing as a respectable business on the surface. However, even Charlie doesn't deal with them directly - more so their bodyguard at the office.
Ask about your next job, and Charlie reveals that there's a valuable painting in Bert's Gallery the Administrators have their eyes on. He's sure that Bert will hand over the painting willingly when he sees some forged delivery documents, mistaking it for a legitimate order from a wealthy client. Mention that Bert isn't likely to give the painting to just anyone. To this, Charlie gives you some forged paperwork. You whisper to yourself that Fairhogg would need to be informed of this first - with Charlie almost catching you in the act.
Take the paperwork to Fairhogg and update him about the case and your assignment. Fairhogg is pleased with you and decides to gather some guards for a raid on their headquarters. He encourages you to go on ahead without him, deliver the painting as promised and attempt to secure the loot so that the forgers don't destroy any evidence. Before you go, he reminds you to wear your disguise.
Go to Bert's Gallery and give him the forged paperwork to receive the Stolen Landscape Masterpiece.
While wearing your disguise, you can tell Bert that your portrait is on display - to which he hopes that you'll be able to pay the artist for her work one day.
With the masterpiece secured, head east from either the market portal stone and through Liberty Walk, or the East Player Market and through the Market Passage to emerge on Judge Street. Attempt to open the locked door and you will announce a special delivery.
A deep voice from inside asks you what the delivery is. Tell them it's a box from Bert's to be allowed entry, as you hear the door being unlatched from the inside.
If you mention Charlie, they'll deny knowing him, suggesting that you shouldn't know him either.
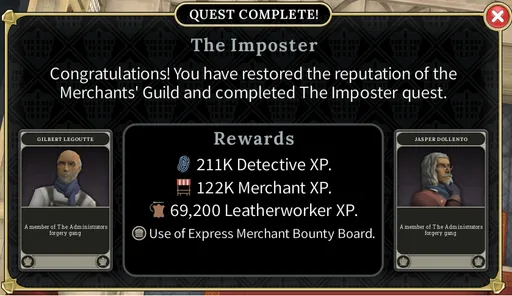
The Imposter
Head into the office to find Jasper Dollento and Gilbert LeGoutte deep in calculation. Speaking to either of them will disrupt their concentration. Gilbert will ask Jasper what a book is worth - 28, while Jasper will ask Gilbert what three scales are worth - 39. Both will tell you to give your delivery to George 'Knuckles' Allsop. This information will be useful later.
Search the bookcase to receive an Administrator's Notebook. Reading it will reveal some equations with goblets, quills, books and scales - two of which you have the values to, thanks to disturbing Jasper and Gilbert. If using a guide, this step may be skipped.
For now, hand the painting over to Allsop. You'll ask if you can meet the Administrators, but he'll tell you they're auditing accounts right now and can't be disturbed, insisting that you leave.
Attempt to open the door behind Allsop and he'll deny you entry. This step is mandatory.
Talk to Allsop and tell him you're trying to hide from the guards outside, to which he'll go out and remind them they're meant to be catching criminals, reassuring you that he'll let you know when the coast is clear. With Allsop distracted, proceed to examine the door to receive the expression Quill x Scroll x Coin x Goblet. Using the information obtained above as well as the Administrator's Notebook, you have to figure out the combination.
Combination solution:
From talking to Jasper and Gilbert we know that Book = 28 and 3 Scales = 39, so Scale = 13.
Book + 2 Scrolls = 52, so Scroll = (52-28)/2, so Scroll = 12
Scales + Scroll - Coin = 21, so 13 + 12 - Coin = 21, so Coin = 13 + 12 - 21, so Coin = 4.
Scroll - Coin + Goblet = 11, so 12 - 4 + Goblet = 11, so Goblet = 11 + 4 - 12, so Goblet = 3.
Quill - Goblet - Coin - Scroll = 38, so Quill - 3 - 4 - 12 = 38, so Quill = 38 + 12 + 4 + 3, so Quill = 57.
So Quill x Scroll x Coin x Goblet = 57 x 12 x 4 x 3 = 8208.
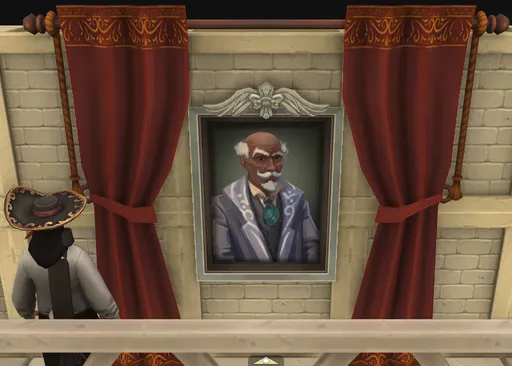
Once inside the study, search the paintings until you find the portrait stolen from the Merchants' Guild.
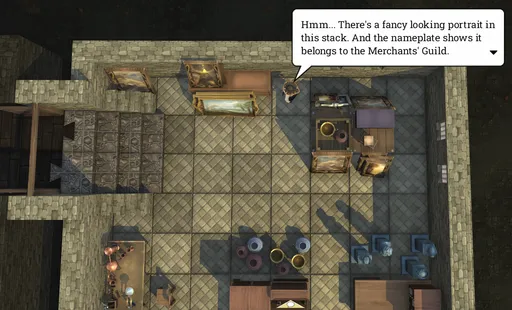
When you find it (refer to image if necessary - it's the only one in the room with a silver frame), Gilbert and Jasper will run inside, demanding that you keep your paws off their paintings and out of their beloved study. Gilbert calls for Allsop, who kindly offers you a taste of his specially prepared knuckle sandwich, before initiating combat (as Gilbert and Jasper run to hide in a corner of the room). He is a normal enemy and thus has no mechanics, so dispose of him how you wish. Healing potions and good Combat equipment are recommended if you are below the recommended level. Allsop is synced to your lowest Crenopolis monster +84, with a minimum level of 140, and has 1,500 HP.
Casting Immunity instantly may allow you to re-equip your helmet before challenging Allsop again, but this has not been explicitly tested.
Once Allsop has been defeated, arrest Jasper and Gilbert and two city guards will rush into the study. They offer to take custody of the criminals and inform you Fairhogg has recommended that you return the painting personally. Take the Merchants' Guild Founder Portrait back to Baldwin.
Finishing up
Head back to the Merchants' Guild and return the portrait to Baldwin, who reveals that the founder of the Guild was his grandfather. He gives you the honor of unveiling it upstairs, and grants you access to the Express Bounty Board.
Congratulations, quest complete! You may head upstairs to officially unveil the portrait.