A guide for the 4-star Mine of Mantuban quest The Maintenance Crew! I'm using this opportunity to play around with the guides feature too so I can get used to everything. The guide is basically lifted and converted directly from the wiki, since I more or less wrote that one too :3
Overview
Start Point: | Speak to Thimble in the Maintenance Room |
Requirements: | |
Items: | 6x [@=Rugged Basalt (Etched)] |
Enemies: |
|
Thimble, Wimble and Dimble
You've been recruited to the goblin maintenance crew! Head north of Strange Junction to the Maintenance Room and speak with Thimble!
Inside, Thimble, Wimble and Dimble greet you warmly… well, as warmly as goblins who “maintain things and keep rooms tidy” can. They ask if you'd be interested in helping out. Agree, and Thimble will give you your first task: meet the crew outside of the Excavation Site northwest of the mines, where a report has come in for some work that needs to be done.
Opening Thimble's Locker at this stage does nothing. You can peek at the two certificates on the wall if you want confirmation that this crew’s idea of competence is… questionable at best.
The First Task
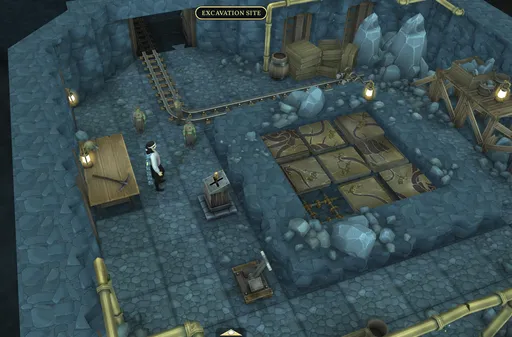
Regroup with the crew at the Rugged Tunnel - the closest teleport is the Hopeforest Central Portal Stone, from there you can head back into the Mines via the rear entrance. Speak to Thimble again to receive an Excavation Site Key. Unlock the door behind her and step inside.
Inside, the crew immediately believe they've stumbled onto some graffiti. Naturally, Thimble calls on Wimble to fetch the PowerWasher Extreme 9000 to clean it up. Wimble tries to leave, but is stopped at the door by Professor Tepler, the goblin who originally sent the request.
Thimble explains they’re here to clean the “graffiti,” but Tepler clarifies the markings are actually recently excavated ancient carvings. Their real task? Fixing a leaking pipe in the corner of the room. Thimble shrugs: “not our department” - pipes are Dabble's specialty. Resigned, Tepler instead asks for help deciphering the carvings, and naturally, Thimble volunteers you for the job.
Use the control panel to move the carvings - a 3x3 slider puzzle - to restore the original picture. There’s a puzzle reset lever nearby if you get stuck. Edges on the carvings give hints about their correct positions; the carving with no edges obviously belongs in the center.
NB: Examining each individual position will reveal which carving belongs in that spot, not what’s currently there.
Slider puzzle solution:

-
From the starting position, move the glyphs right, right, down, left, left, down, right, up, right, up, left, down, right, down, left, up to solve the first row.
-
From here, move the glyphs right, up, left, left, down, right, right, up, left, left, down, right, up, left to finish the puzzle.
Once the puzzle is completed, Tepler mentions that it looks familiar, saying she needs some time to research this - so you'd better come back later.
Before moving on, speak to Thimble - you'll get an earful for "slacking off" before she whisks you away to your next job - a repair task in the {{Room|Slime Pool}}. Thimble asks you to meet them just outside, in the {{Room|Grimy Slimy Junction}}.
Feel free to protest her false accusation - Thimble won't believe you anyway.
The Second Task
Make your way to the junction and meet back up with the crew. Thimble hands you a Sign Repair Kit and asks you to repair the sign in the pool - easy, foolproof.
You may read the sign before repairing it, which reads "Warning! Do not touch the slime. It'll turn you into a s...".
Head into the pool room and repair the Battered Sign. Don't worry about Blobs - you'll be in a safe, quest instance of the room.
...prepare yourself for a boss fight.
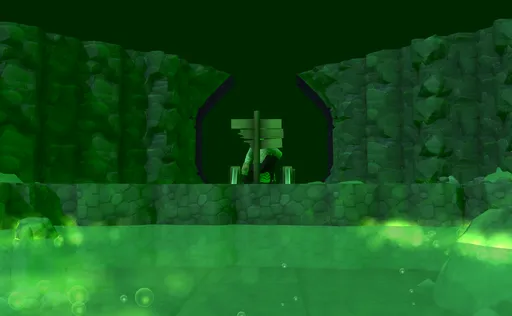
As soon as you attempt the repair, an ominous cutscene triggers - a Massive Blob rises from of the slime pool!
The Blob is scaled to your lowest Mine of Mantuban enemy +58, with a minimum level of 94 ![]() . It has no immunities or weaknesses.
. It has no immunities or weaknesses.
Massive Blob mechanics:
- The Blob will spawn at the western edge of the pool initially, where the sign was destroyed.
- It has a default Impact ranged attack which it uses regardless of its distance from the player.
- The Massive Blob will inhale three times before spitting in front of itself - similar to how it destroyed the sign - which leaves a 2x5 AoE that will deal continous damage to the player so long as they remain in the pool for 2.5% of their maximum HP per tick.
- When the Blob sinks underwater, its bubbles will indicate where it will surface next.
After defeating the Blob, pick up the battered-again sign and return to Thimble. The crew, naturally, refuses to believe you were ambushed by a giant slime monster. Instead, they accuse you of incompetence and proclaim you a waste of their wages… despite the fact that, technically, you’re still unpaid.
Once the crew are done gaslighting you, Thimble sets you up with your third task - dealing with some potholes around Gassy Cave
The Third Task
Teleport to the Mine Southwest Portal Stone and head into Gassy Cave to regroup with Thimble. She points out the “potholes” in the cave and the Moderate Mineshaft to the south - the spawn points for Floor Tentacles - declaring them a clear violation of regulations. She’s aware of the tentacles and notes you’ll need something sturdy to keep them from popping back up.
You can suggest several materials - cement, stone, or metal. Cement and stone won’t cut it, leaving metal as your only real option: molten metal, poured and left to set.
Thimble will reply with "you do look like the type to suggest..." when you suggest your faction-appropriate material.
Wimble and Dimble, as always, are unavailable to help with the potholes because they have extremely important none-of-your-business business to attend to.
You’ll need a source of molten metal and a way to transport it. Thimble directs you to her locker for objects to smelt, and suggests talking to other goblins for transport solutions:
- Head back to the Maintenance Room and get her Metal Trinket.
- Talk to Moccasins in the Sculpting Room about a container to transport molten metal. He suggests a Thermal Flask, which can be made from 6 [@=Rugged Basalt (Etched)].
- Once you have the materials, return to Moccasins and make the flask.
With flask in hand, head to the Goblin Workshop. Use the trinket with the Goblin Smelter and the thermal flask with the ingot mold. Smelt the trinket down to create your molten metal.
Return to the Moderate Mineshaft and Gassy cave, defeat all nine tentacles across both rooms (lowest Mine of Mantuban monster +4 ![]() ) and fill in the potholes as you go.
) and fill in the potholes as you go.
Once all nine are dealt with, report back to Thimble. She assumes you found the ore in her locker. You will have two chances to either express surprise (and tell her the truth) or claim that you did take the ore:
If you expressed surprise, Thimble will be shocked, questioning what you smelt instead of the ore. She will then be explicitly mad-not-disappointed at you when you confess what you used in its place.
If you tell her that you did in fact smelt the ore down, she will be relieved that you spared her employee of the month trophy... oops.
Tepler shows up again, demanding you stop sealing the potholes - but this time she’s too late. The crew initially claims credit, until Tepler points out a problem, and the blame immediately bounces back to you.
Tepler explains that the carvings warned of an ancient creature, the Krakanaxa, a long-tentacled beast that once inhabited the mines and could burrow through rock. She fears the corruption may have awakened it - but it seems unlikely to be the same creature. Suddenly, the cavern shakes and rocks tumble into the newly sealed potholes, confirming the worst.
Thimble, naturally, calls on you to investigate while the rest of the crew “waits it out” in the Maintenance Room. Meanwhile, Tepler retreats to her office to research the mysterious creature.
Over the Lost Lake
Follow the source of the commotion to the goblin living quarters, where you will find find two Angry Tentacles terrorizing the goblins. Take them down however you like and speak to the nearby goblin civilian. Let him know these are the same tentacles that appeared in Gassy Cave - as the room shakes again. You notice the sound coming from the west, and leave the goblin to investigate further.
Two more tentacles are causing havoc in the Goblin Storage Cave. Deal with them the same way, speak to the civilian, and - surprise! - another earthquake hits, this time from the south.
Make your way past the Stonemasonry Room into Professor Tepler's Office, only to find the professor on the floor and the office in ruins. She recounts being knocked down as tentacles smashed through her back wall, revealing a path deeper into the mines.
Help her up and examine the hole. Tepler notes that the draft she’s been feeling finally makes sense, and encourages you to follow the passage to the source of the tentacles. Surprisingly, she offers to accompany you - albeit from a safe distance.
Head into the Lower Hidden Passage to find nine Floor Tentacle potholes. Carefully navigate past them - it's still possible without activating any - and proceed through the Upper Hidden Passage into the Lost Lake, where five tentacles rise out of the water and demolish the bridge in front of you.
Tepler needs a moment to recover, so she sends you to scout ahead and figure out a way across the chasm.
NB: Krakanaxa's tentacles will not indicate the square that they are hitting. You must discern the pattern yourself.
Continue west into the Calamari Causeway, dodging tentacles as you run past without falling into the water. Each wider platform acts as a checkpoint.
Next, navigate the Crumbling Causeway, avoiding gas vents that can knock you into the water.
Crumbling Causeway solution:

- From the starting point, run forwards two tiles to bait the gas vents, immediately run back to dodge the blast, and immediately head for the first ledge.
- Run the entire way across the northern path. Avoid the second ledge as it will crumble and send you into the water.
- Move south one tile to bait the gas vents, QUICKLY run back to avoid the blast and QUICKLY move onto the next ledge, as the vent next to you will fire after you bait the eastern wall.
- Once you have reached the ledge, you may proceed into the next room.
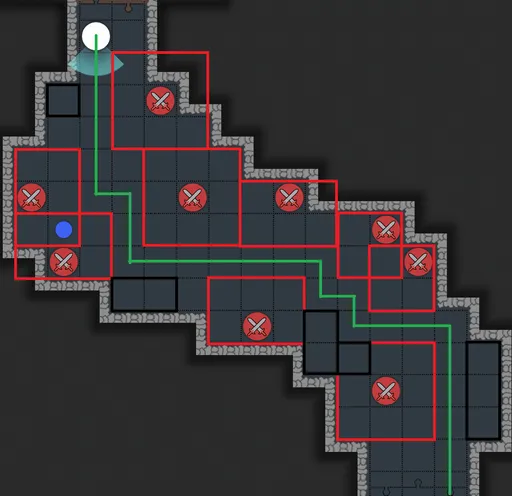
Finally, make your way into the Thermal Springs. Here, you’ll need to dodge tentacles while pushing three rocks into the springs. This increases the water pressure of a southeastern spring, raising a platform to the surface and granting passage. Watch out - some stone pillars crumble underfoot. If you fall in, you’ll need to restart the puzzle from scratch.
Thermal Springs solution:

- Directions are provided with North pointing upwards.
- From the starting point, once the tentacle on the right goes past the tile next to the rock, QUICKLY push it into the water as the tentacles will keep moving during the cutscene. Run south to the safe ledge afterwards before the tentacle catches up with you.
- Once the same tentacle goes past you, and the one to your west is past the midpoint of the room, run and push the boulder to the west. Use the boulder's location as a safespot for this tentacle.
- Wait until the tentacle immediately to your left moves past you, then cross the western ledge. Wait again for this tentacle and follow behind it to the third rock, pushing it into the water and fully raising the platform.
- Follow behind the tentacles as you make your way back around to the floating rock, and proceed into the next room.
You will emerge on the other side of the Crumbling Causeway. Head east back into the Lost Lake. You’ll reunite with Thimble, Tepler, Wimble, and Dimble on the far side of the bridge - the crew having apparently “fixed” it while you were busy battling tentacles. Naturally, they claim they acted on a call about the disturbance in Tepler’s office.
Speak to Tepler for a reference to Thimble's first-aid certificate before the group moves forward. Dimble admits they only tagged along to catch a glimpse of the giant creature, exposing Thimble’s plan - much to her annoyance.
Travel through the Foreboding Causeway and into the Lashing Lagoon. Prepare yourself for a boss fight.
The Krakanaxa
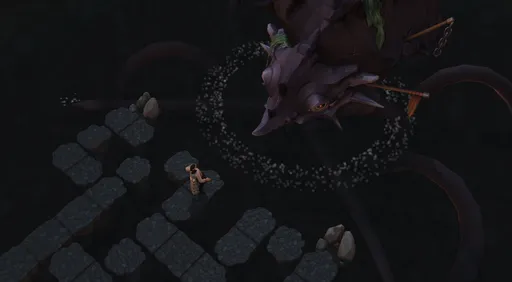
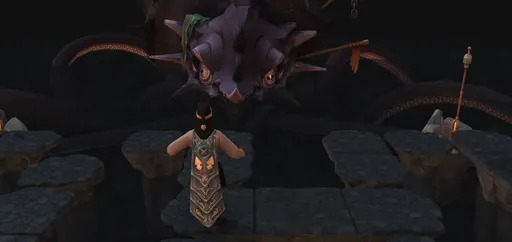
Tepler notices a disturbance in the water, which cues Thimble to automatically volunteer - you, as usual - for the job of investigating it. You cautiously navigate past the pillars… only for an inconspicuous water bubble to reveal itself as the legendary Krakanaxa. Before you can escape, it destroys the path back to the group, stranding you in its arena.
Tepler can barely believe the creature exists, while Thimble reassures her that they’ve got just the right device for the job: the T.E.A. C.U.P.
Thimble gives a crash course on how to operate it. The device uses two rods - the T.E.A. L.E.A.F.s - to deliver a hefty electric jolt. Before she can progress further, Krakanxa shakes the room with another earthquake, interrupting the explanation and starting the fight.
The Krakanaxa is scaled to your lowest Mine of Mantuban monster +58 ![]() , with a minimum level of 94
, with a minimum level of 94 ![]() , boasting 20,000HP.
, boasting 20,000HP.
If you die or cast Immunity during the fight, you will be back in the Foreboding Causeway. Run back into the Lashing Lagoon to re-trigger Krakanaxa trapping you in the arena.
Krakanaxa mechanics:
- The Krakanaxa's damage is scaled to 20% of the player's maximum HP per hit.
Phase 1:
- The Krakanaxa will initiate the fight with a barrage of tentacle slams, which hit a width 3 AoE along the entire arena in the direction they are oriented in. These are telegraphed and must be dodged, or you will be knocked down and Thimble will say a witty line.
- Tentacles alternate between horizontal and vertical attacks - unless you’re hit, in which case the previous orientation repeats.
- The midline of the AoE targets the player unless you’re at the edge, where it aims at the line in front of you. Dodging is generally easier in the center than on the edges or corners.
Phase 2:
- After six slams, the Krakanaxa dives underwater, and smaller tentacles emerge.
- Dimble and Wimble will throw two T.E.A. L E A.F.s into the arena. Pick them up while avoiding the tentacles and plant them into the rocks on the southern corners of the arena.
- Tentacles during this phase will not have telegraphs, functioning similar to the tentacles in Thermal Springs.
Phase 3:
- The Krakanaxa resurfaces, and rocks rain down from above. It catches Thimble mid-electrocution attempt and sends nine tentacles to attack her.
- Dodge the falling rocks while defending Thimble by hitting the tentacles before they can throw rocks at her.
- If Thimble is hit, the fight resets to Phase 1, and upon progressing back to Phase 2, the T.E.A.L.E.A.F.s are knocked out of their rocks - so stay alert!
- Be careful not to be overwhelmed here as the tentacles can spawn very quickly.
If successful:
- Thimble will deal 50% of the boss's hitpoints (10,000) and provide you with a healing potion.
- The Krakanaxa will revert back to Phase 1 - repeat the phases again to defeat it. Upon progressing to Phase 2, it will knock the T.E.A. L.E.A.F.s out of their rocks.
Finishing up
After the Krakanaxa’s defeat, it sends a giant tidal wave crashing through the arena, tossing you and the team back to the Foreboding Causeway. Tepler wants to double-check that it’s actually gone, but the crew is satisfied that a good thrashing was probably enough.
Thimble will stop you if you try to move back into the boss room, before initiating normal quest dialogue.
You can additionally ask Thimble about her T.E.A.C.U.P. machine - which stands for Tempestae Etching Apparatus Control Unit Panel, while L.E.A.F. stands for Lightning Emitting Antennae Fixture.
Ask Thimble what you're doing next - she admits she forgot in the excitement, but there is one final stop to make: meet her at the {{Room|Rock Strewn Tunnel}}. Tepler mentions she’ll be returning to her office, so drop by when you can.
At the tunnel, Thimble asks you to take a wild guess at what’s next. All three guesses are wrong (of course), so just let her tell you. The task? Another monstrosity - the ivy, not Dimble, sadly - which must be stopped before it damages the rock. Luckily, Thimble has the perfect tools: explosives.

You plant the charges, and the ivy goes boom, revealing a new pathway. The crew is horrified, insisting you were only meant to remove the ivy - not demolish the wall entirely. They quietly agree to keep this little mishap a secret from Dabble, leaving you to enjoy the chaos. It's been emotional.
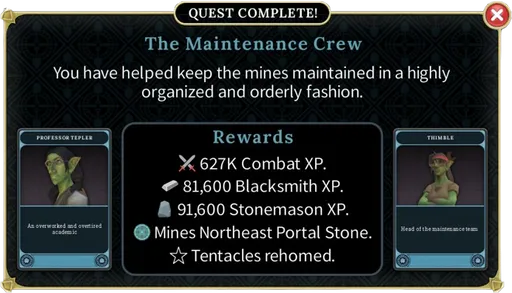
Head into the newly revealed room to activate your new portal stone, then meet Tepler in her office. She thanks you for your help with the excavation and hands over your quest reward.
Congratulations, quest complete!